67 Best Easy Flower Nail Designs Step by Step That Look Expensive (But Aren’t)
You know that moment when you see a nail design on Pinterest and think, “That’s gorgeous but there’s no way I can do that at home”? Flower nails have that reputation. They look intricate, delicate, and like something that belongs in a high-end salon but most of the actually stunning ones are built on surprisingly simple techniques. That’s the secret nobody talks about.
This guide is all about easy flower nail designs step by step, written specifically for people who don’t own a full nail art brush set or have hours to spare. If your mornings are rushed and your patience runs thin after the second coat, these ideas are built for you. From barely-there petal accents to bold botanical statements, every look here is designed to be recreatable not just pretty to scroll past.
Flower nail art is having a real moment in 2026. Soft daisy clusters, blush rose details, and graphic wildflower prints are everywhere right now and the best part is that most of them start with tools you probably already have. A dotting tool, a thin brush, or even a toothpick. That’s genuinely all you need for most of these.
Five-Dot Daisy on a Sheer Nude Base
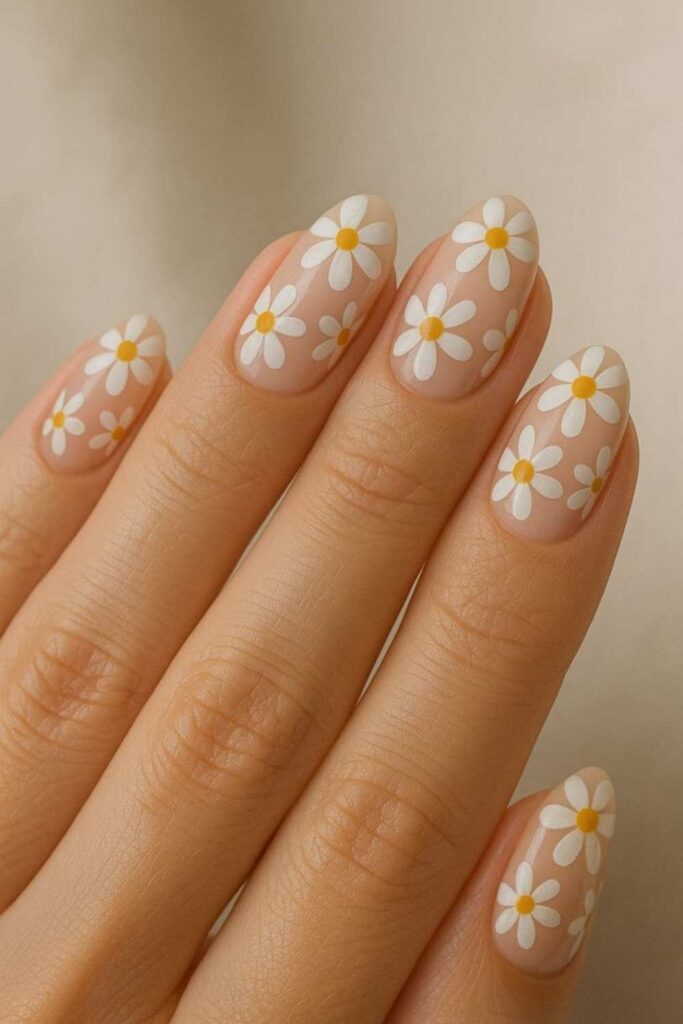
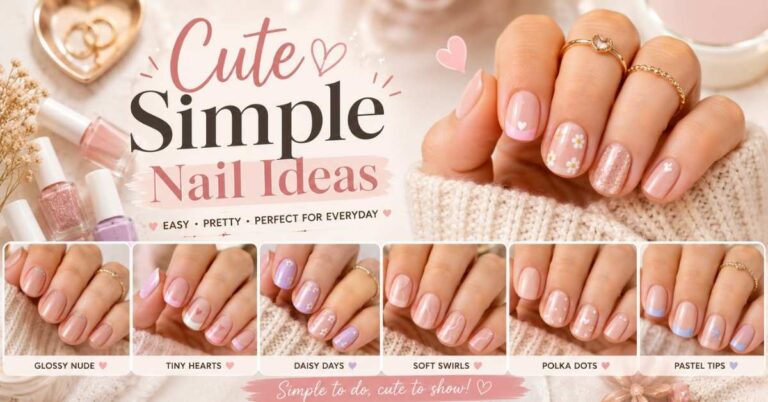
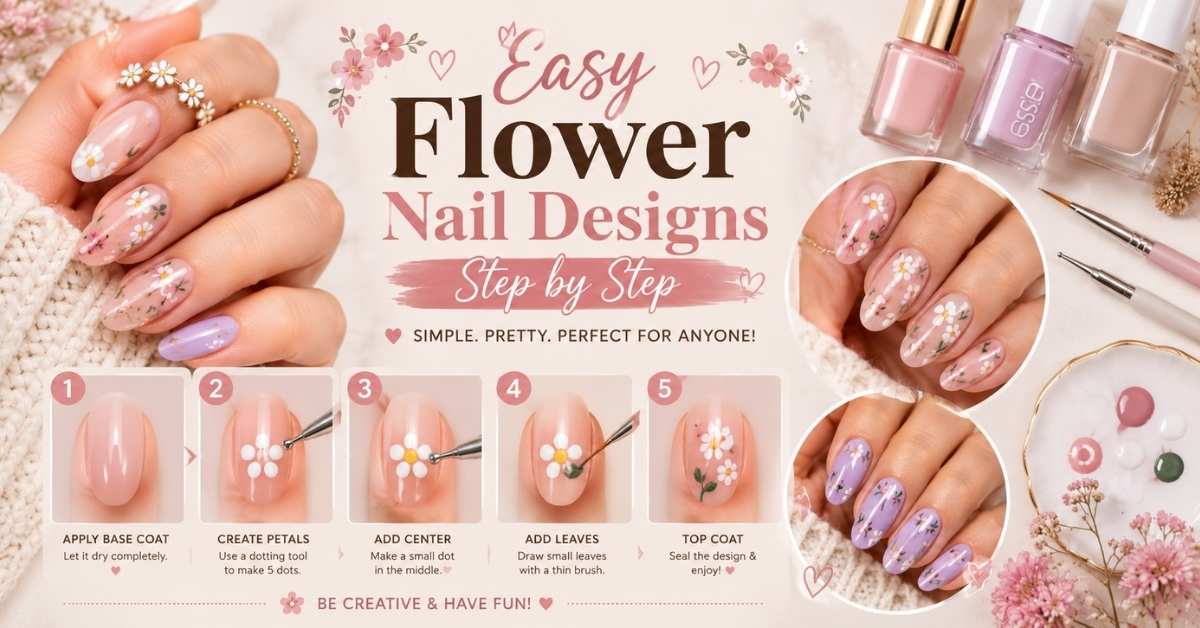
Honestly, this one is the easiest entry point into flower nail art and it looks like you paid for it. Apply a sheer nude or milky base, let it dry, then use a dotting tool to place five white dots in a circle. Add one yellow dot in the center. Done. The sheer base makes the daisy pop without competing for attention, and the whole design takes under three minutes per nail once you get the hang of it. This is one of those easy flower nail designs step by step that beginners keep coming back to because it just works every time.
Soft Pink Rose Swirl with a Thin Brush
This looks complicated. It takes about ten minutes. Start with a dusty pink or white base, then use a thin detail brush loaded with a slightly deeper rose shade. Make a small curved C-shape in the center of your nail that’s your rose bud. Add a slightly larger C around it, then one more. Three strokes, and you have a rose. A light coat of glossy top coat pulls the whole thing together and makes it look intentional rather than hand-painted-by-someone-learning. In my experience, this works best when you use two shades of the same pink family rather than contrasting colors.
Graphic Black Outline Flowers on White
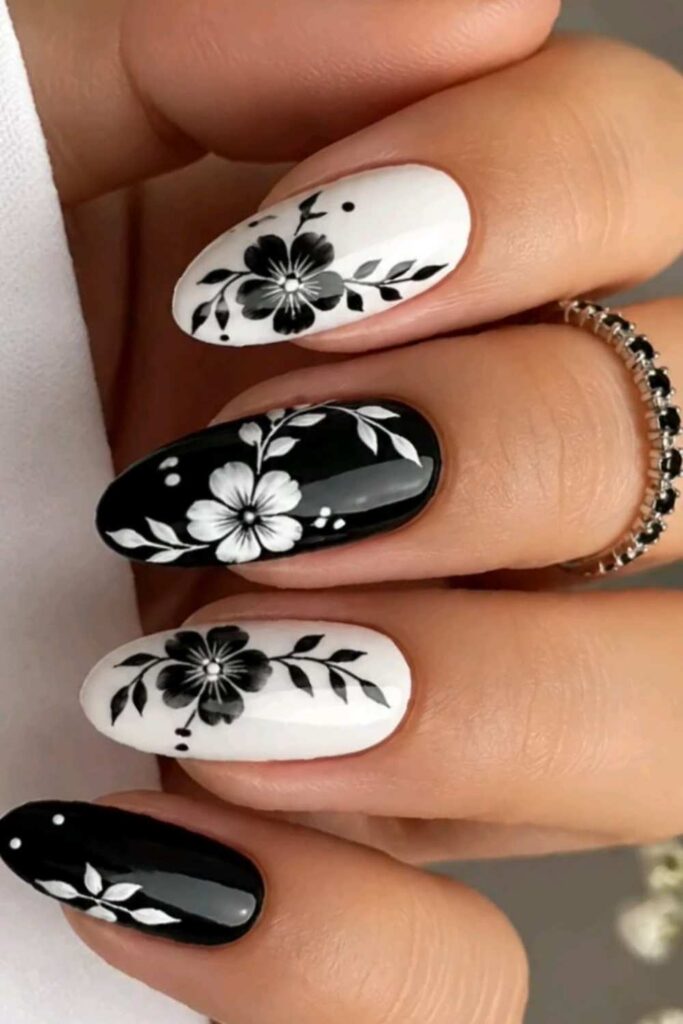
Bold, editorial, and surprisingly low-skill. Paint your nails white, let them dry completely, then use a thin nail art pen or a liner brush dipped in black gel polish to draw simple open flower shapes a circle center with rounded petals around it. These don’t have to be perfect. The slight imperfection actually makes them look more intentional and handmade. Add a few loose leaves between flowers to fill space. This is one of those easy flower nail designs step by step that photographs incredibly well and gets “where did you get those done?” every single time.
Watercolor Blush Petals on a Translucent Base
If you’ve ever wanted that soft, dreamy nail look that’s been all over Pinterest lately this is it. Dilute a sheer pink or lavender polish slightly, then dab loose petal shapes onto a clear or barely-there base using a flat brush. The key is not to blend too much. Let each petal sit slightly separate, soft at the edges. When it dries, add a matte top coat for that watercolor-painting finish. The whole thing feels effortless because it’s supposed to look imprecise.
Read More About: 39 Quick Nail Designs Easy Enough to Do at Home (That Actually Look Salon-Done)
Yellow Sunflower Accent on a Deep Brown Nail
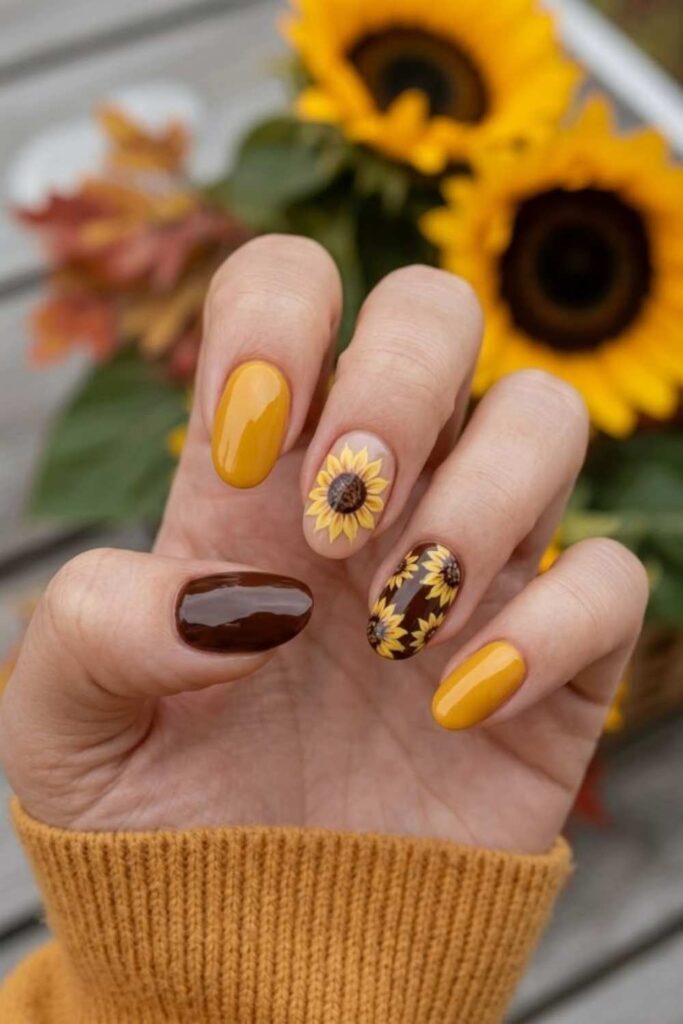
One accent nail, maximum impact. Keep four nails in a rich chocolate brown or espresso shade, then on your ring finger, paint a sunflower: yellow petals using a flat brush, radiating outward from the center, with a dark brown dot cluster in the middle. The contrast between the warm yellow and the deep brown base is genuinely stunning. This is the kind of design that makes people stop mid-conversation to ask about your nails.
Tiny White Flowers Scattered Across a Sage Green Base
Scattered florals are having a major moment, and this version is incredibly beginner-friendly. Paint all nails in a muted sage green, then use a dotting tool to create small five-petal white flowers randomly across one or two nails or all of them if you’re feeling ambitious. Vary the flower sizes slightly so it doesn’t look too uniform. A few gold dot centers add just enough polish. This works for everything from weekend brunch to a work meeting.
French Tip with Petal Edges Instead of a Straight Line
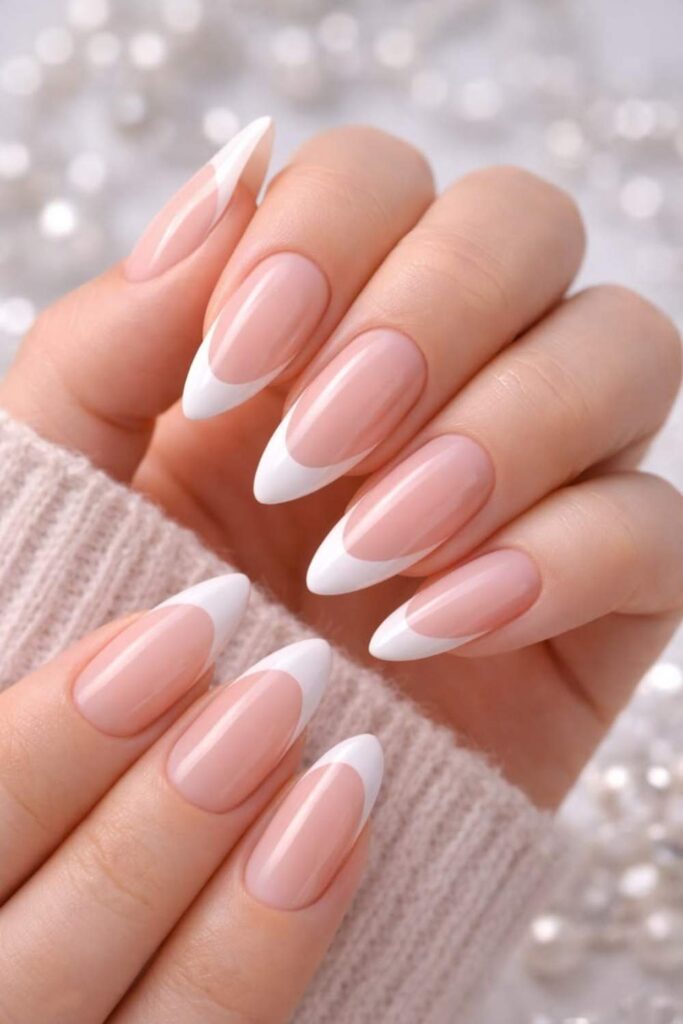
Take the classic French tip and make it actually interesting. Instead of painting a straight white line across the tip, use a thin brush to create a scalloped petal edge five small arches that form a flower shape across the top of the nail. It’s the same movement as a regular French tip, just curved into soft peaks instead of a flat line. Looks high-effort. It isn’t. This is one of the most clever easy flower nail designs step by step because it reinvents something familiar without requiring new skills.
Pastel Ombre Base with a Single Rose Detail
You don’t need a fancy sponge technique for this. Apply two pastel shades say, lavender and baby pink side by side on the nail and blend lightly with a flat brush while still wet. Let it dry, then add one detailed rose on the ring finger using a darker pink. The rose becomes the focal point, and the ombre acts as a soft background rather than a competing element. It looks like a lot more thought went into it than actually did.
Cherry Blossom Branch on a Bare or White Nail
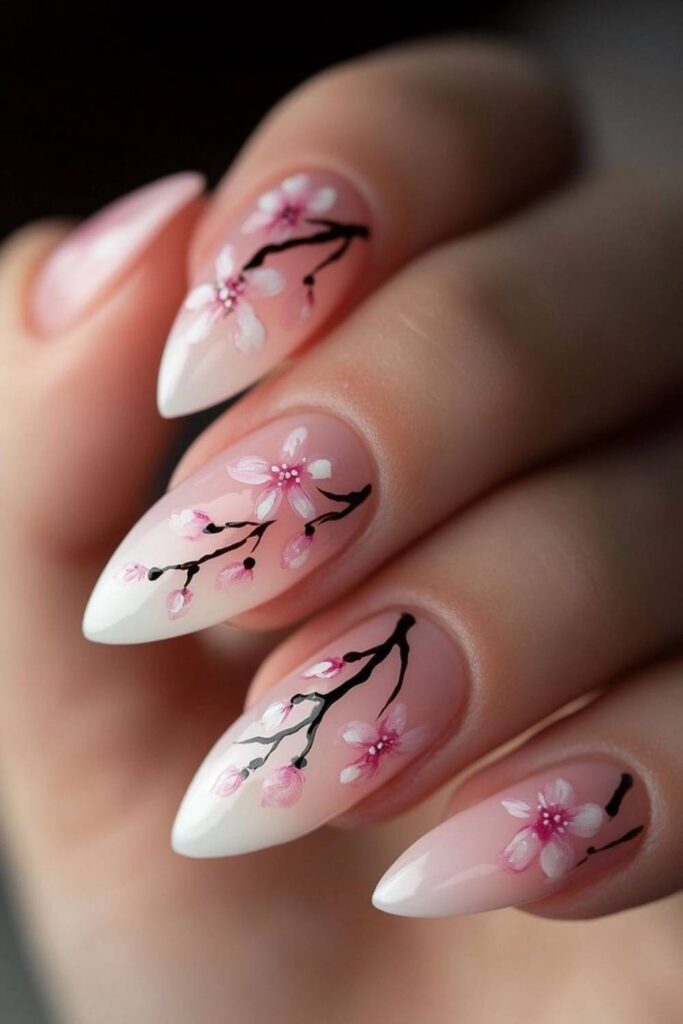
This is the one that gets saved 50,000 times for a reason. It’s delicate, romantic, and genuinely easy once you break it down. Use a thin brush to paint a simple diagonal line across your nail that’s the branch. Then use a dotting tool to add clusters of tiny five-dot blossoms in soft pink along and around the branch. A few isolated dots floating off the branch mimic falling petals. On a white or bare base, it looks like fine art. I’ve noticed this style tends to look even better on longer nail shapes, but it works on short nails too.
Neon Tropical Flower on a Black Base
If your style leans bold rather than delicate, this is your version. Paint nails black, then use a bright coral or hot pink to draw a large, open hibiscus-style flower on one or two accent nails. The petals are wide and simple no intricate detail needed. Add a yellow stamen in the center with a dotting tool. The neon-on-black contrast is loud in the best way, and it’s one of those easy flower nail designs step by step that looks like it belongs on a runway without requiring runway-level skill.
Lavender Floral Cluster with Gold Foil Accents
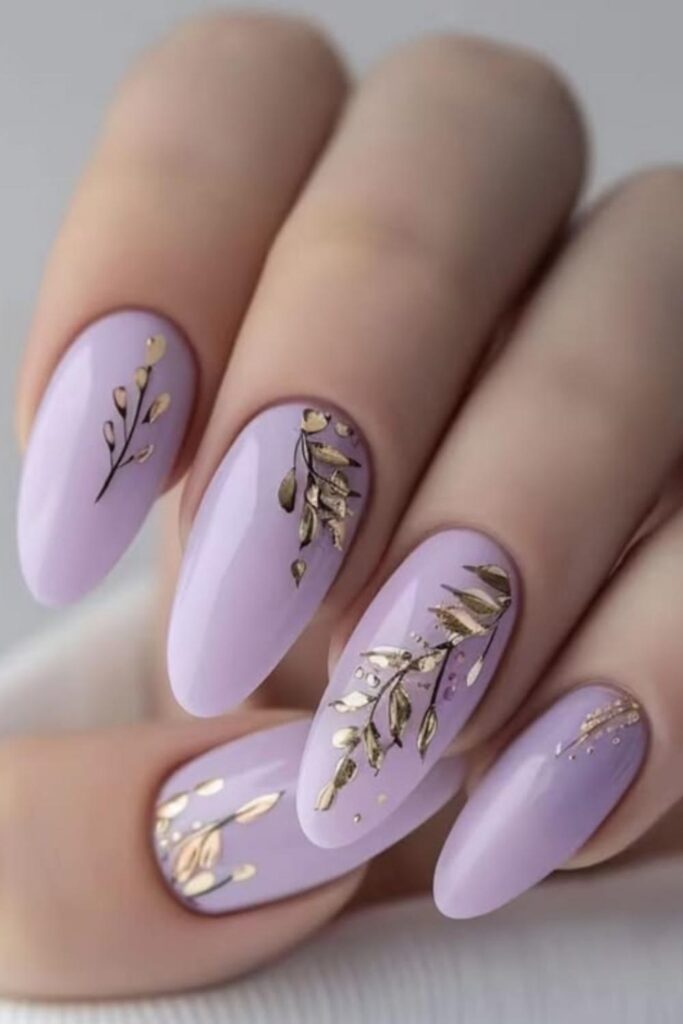
Lavender is one of those shades that makes every nail design feel more elevated automatically. Paint a soft lavender base, add small clusters of deeper purple dot-flowers using a thin brush, then press tiny pieces of gold foil between the clusters while the top coat is still tacky. The gold catches the light and makes the whole thing look expensive without adding much complexity. Versatile enough for a formal event or a casual Saturday.
Minimalist Single-Stem Flower on a Nude Nail
Less is genuinely more here. A single nude or skin-tone base, one simple flower painted near the cuticle or along the side of the nail just five petals and a dot center and nothing else. The negative space does all the work. This is the kind of design that works with any outfit, any occasion, and never feels like too much. If you’re new to nail art and want to start with easy flower nail designs step by step, this is the one I’d actually recommend trying first because there’s very little margin for error.
Retro 70s Daisy with Thick Outlines
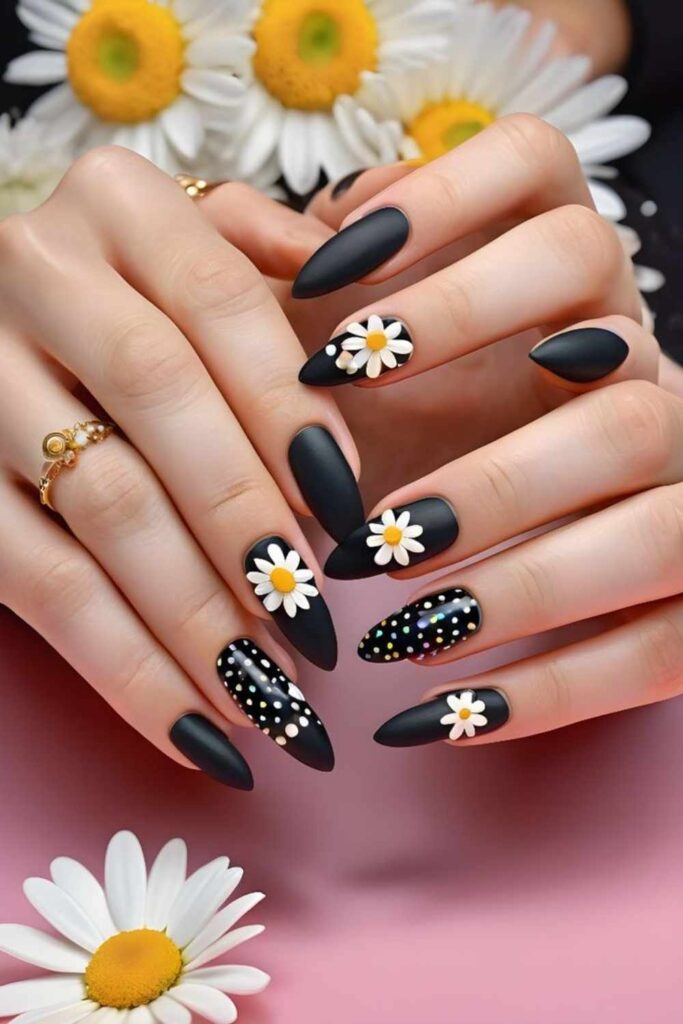
Groovy, nostalgic, and perfect if you like your nail art to have personality. Paint a warm cream or off-white base, then use an orange, mustard, or rust polish to draw chunky, outlined daisy shapes with a liner brush. The petals should be slightly uneven and graphic think coloring book, not botanical illustration. These are best on shorter, rounder nails where the retro proportions land correctly. You’ll probably find yourself reaching for this more than expected once you nail the first try.
Pressed Flower Effect Using Dried Petals
This one genuinely surprises people. Apply a base coat, let it dry, then place an actual tiny dried flower (pansy petals work perfectly) directly onto the tacky second coat. Press it flat, let it dry fully, then seal with two thick layers of gel top coat. The result looks like a preserved botanical specimen trapped in glass. It’s one of the more unique easy flower nail designs step by step because it requires almost no painting skill just patience and a pair of tweezers.
Abstract Brushstroke Petals in Coral and White
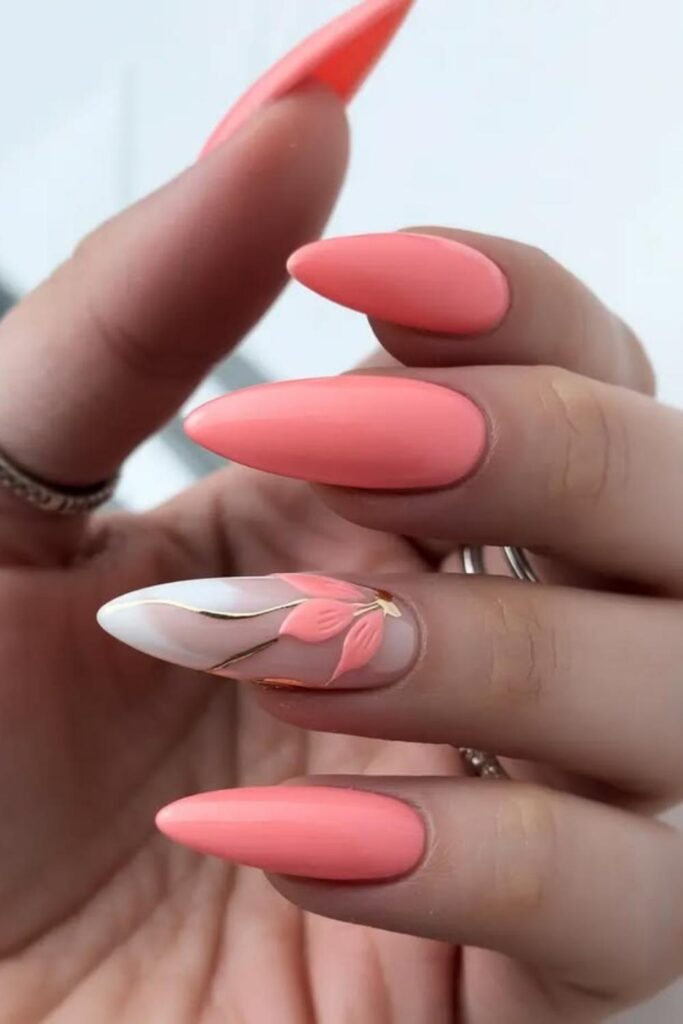
Forget precise petals. This version uses loose, confident brushstrokes in coral and white to create an impressionist flower effect on a neutral base. Load a flat brush with coral and swipe curved strokes outward from a center point. Add white strokes between them. Don’t overthink placement the imprecision is the point. It’s abstract enough that there’s nothing to “get wrong,” which makes it one of the most low-pressure options on this entire list.
Baby Blue Forget-Me-Nots on a White Base
Dainty, fresh, and one of the prettiest combinations in spring nail art. Baby blue tiny flowers on a crisp white base look like something from a cottage garden. Each flower is just five small dots arranged in a circle with a yellow center you can cover an entire nail in these or keep them clustered on one accent nail. Either way, the blue-and-white palette feels clean and intentional without requiring any advanced technique.
Glossy Red Rose on a Deep Green Base
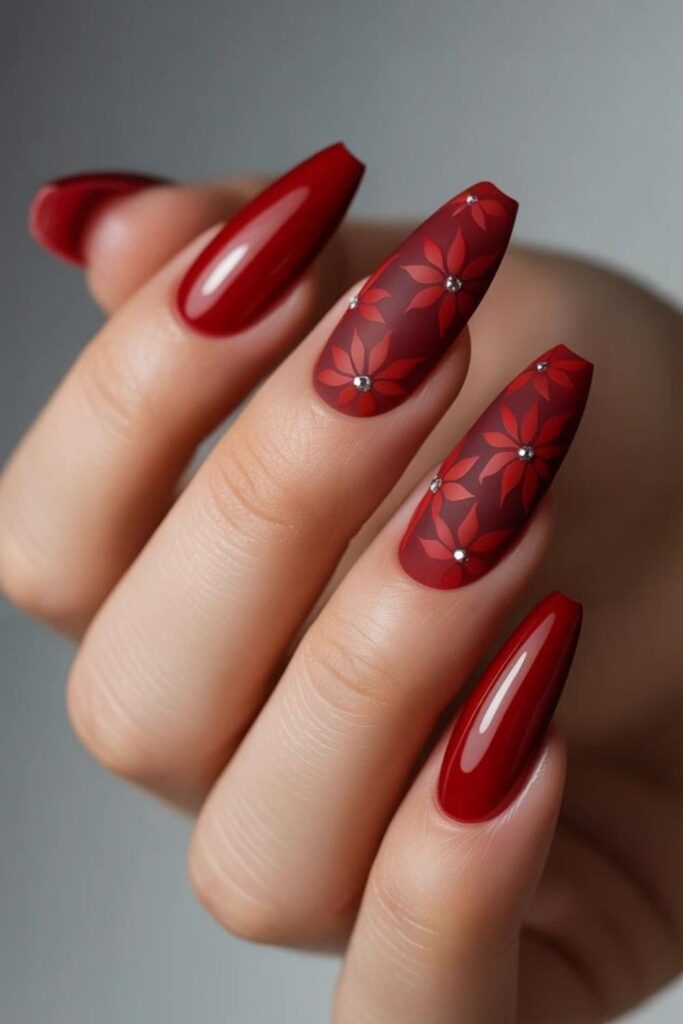
Dark, dramatic, and not like anything else on this list. A deep hunter or forest green base sets the stage for one or two highly detailed red roses painted using the C-stroke method from idea number two. The jewel-tone contrast makes the whole design feel rich and editorial. This is a strong autumn or winter nail choice, and honestly, it photographs beautifully under any lighting. Easy, reliable, and surprisingly versatile once you’re confident with the rose stroke.
Pastel Rainbow Petals, One Color Per Nail
Each nail gets a different pastel blush, mint, yellow, lilac, peach and each one gets the same simple five-petal flower painted in white at the center. The variation comes from the base color, not the design itself, which makes this approachable even for beginners. Together, they create a cohesive pastel rainbow set that feels playful without being childish. This is a great option for anyone who wants a full nail set that reads as intentional but doesn’t require advanced brush skills.
Fine-Line Botanical Sketch on a Cream Base
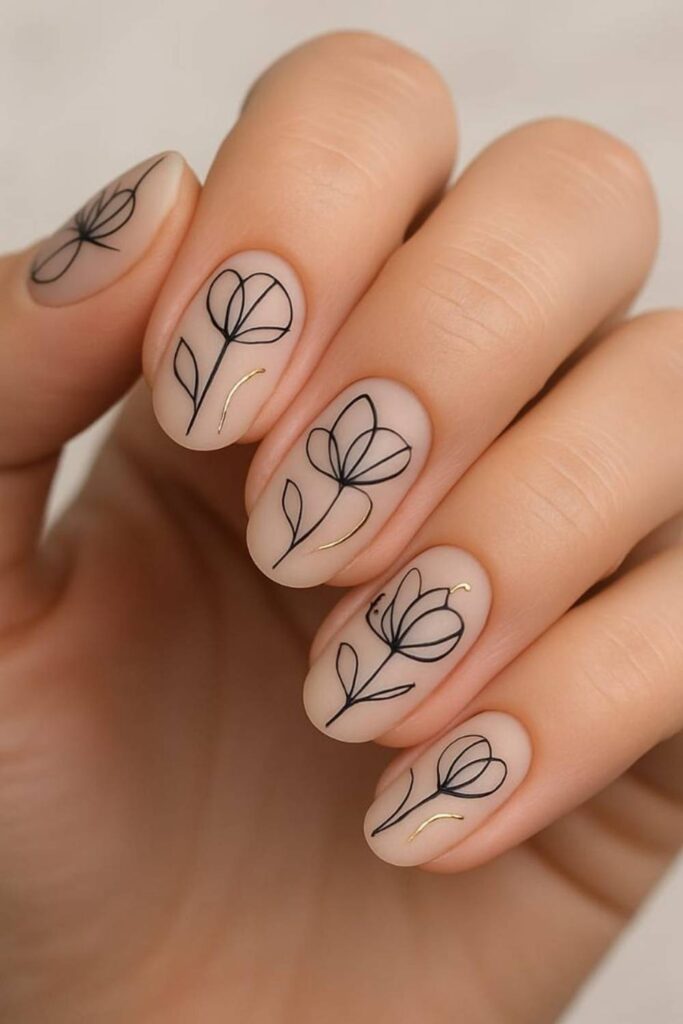
Think botanical illustration the kind you see in vintage field guides. A warm cream base, then a very thin brush or nail art pen used to draw delicate flower outlines, stems, and leaves in soft brown or olive. No solid fill, just the line work. It’s one of those easy flower nail designs step by step that looks incredibly polished precisely because it’s restrained. The key is using a fine enough tool and keeping your hand steady resting your painting hand on the table helps a lot.
Chunky Daisy French with a Pop Color Center
The traditional French tip gets a full personality transplant here. Instead of white tips, paint oversized daisy petals in white extending from the tip downward, with a bold center dot in electric yellow, hot pink, or cobalt blue. It’s playful, modern, and totally Pinterest-worthy. The chunky scale means you don’t need precision wider petals are easier to paint than tiny ones, and the pop color center pulls everything together regardless of how perfectly the petals line up.
Muted Wildflower Print Across All Ten Nails
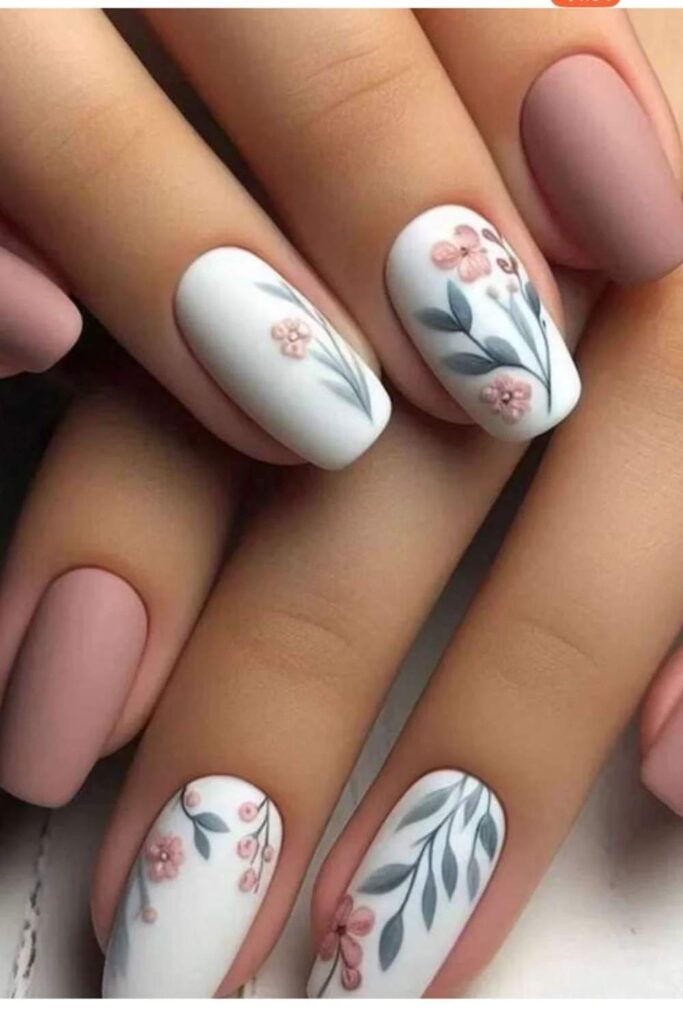
Instead of one accent nail, this concept covers all ten each with a slightly different arrangement of small wildflowers in muted tones like dusty rose, sage, and warm tan. It’s organized chaos that reads as a cohesive set. Use a dotting tool for the smaller blooms and a thin brush for any with petals. The muted palette is what makes it feel grown-up rather than craft-project. Most people don’t know this variation of full-nail floral prints exists and it’s genuinely one of the most wearable on the list.
Chrome-Tipped Petals on a Matte Blush Base
This combination is the exact moment to try a trend that’s been building steadily: chrome details on matte nails. Paint a matte blush base, then use a chrome powder and a silicone brush to dust just the tips of hand-painted white petals. The result is a flower that seems to shift between soft and metallic depending on the light. It looks simple, but the effect is surprisingly elevated and it’s one of those techniques that photographs far better than it sounds on paper.
Purple Pansy on a Sage and White Negative Space Nail
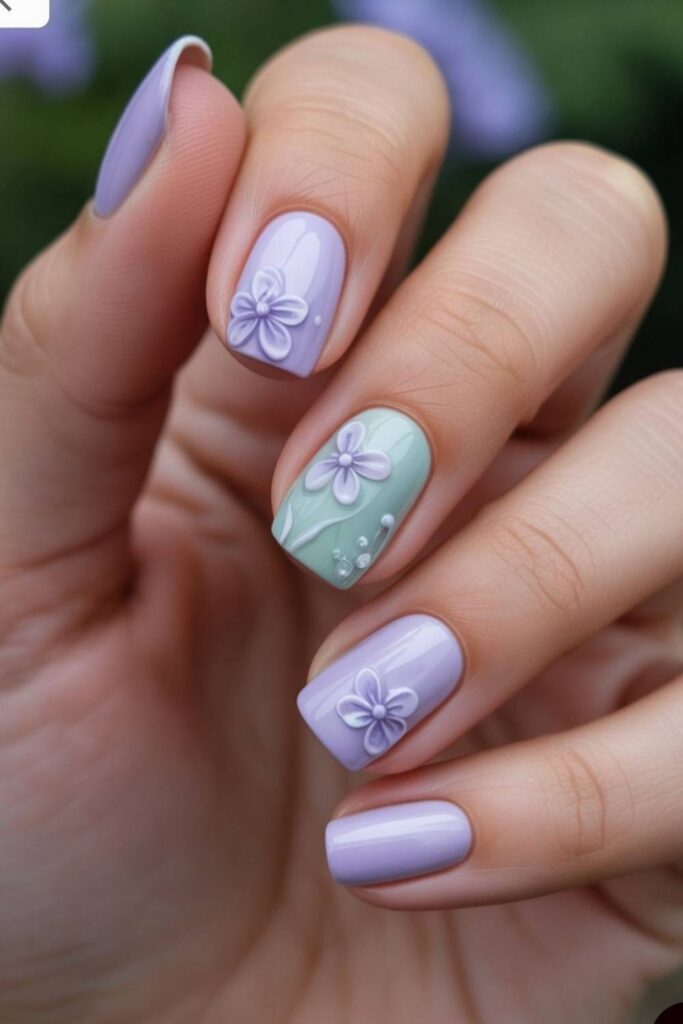
Two-tone negative space nails with a floral detail hit differently. Paint half the nail in sage green and leave the other half bare or white, then paint a realistic-ish pansy along the dividing line purple petals with yellow and dark purple markings. The negative space gives the design breathing room and makes even a more detailed flower look editorial rather than busy. This one takes slightly more patience but still falls firmly in the easy flower nail designs step by step category.
Sunset Ombre with Silhouette Flower Overlay
Paint a soft sunset ombre across the nail peach fading into coral fading into soft yellow. Once dry, use black or dark brown to paint simple flower silhouettes: just the outline shape, no fill. Against the warm ombre background, the dark silhouettes look graphic and intentional. It’s one of the more striking looks on this list and works especially well on longer nail shapes where the ombre gradient has room to breathe.
Tiny Gold Flowers on a Jet Black Base
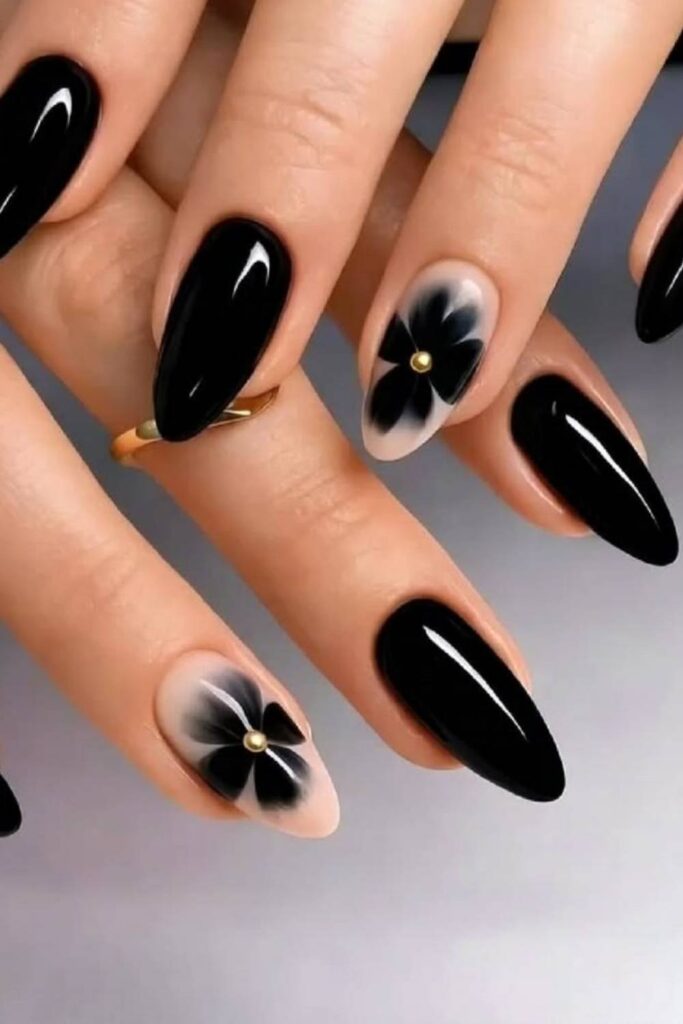
Jet black nails feel sophisticated on their own. Add tiny gold flowers just five small dots per flower, scattered across one or two accent nails and the whole set moves from minimalist to genuinely special. Gold on black is one of those combinations that just works every single time without overthinking. This one is low-effort but the effect is surprisingly polished, which makes it easy to recreate on a weeknight without much setup.
Soft Lilac Floral with Pressed Leaf Detail
Similar to the pressed flower technique, this version combines hand-painted lilac blooms with a single tiny pressed leaf (from herbs like mint or thyme the leaves are thin enough to press flat). Place the leaf between two painted flowers before sealing with top coat. The mix of painted and natural elements creates a texture that no purely painted design can replicate. Organic, unexpected, and genuinely beautiful.
Read More About: 43 Blooming Gel Nail Art Ideas That Look Like They Took Hours (But Didn’t)
Monochrome White-on-White Floral Texture
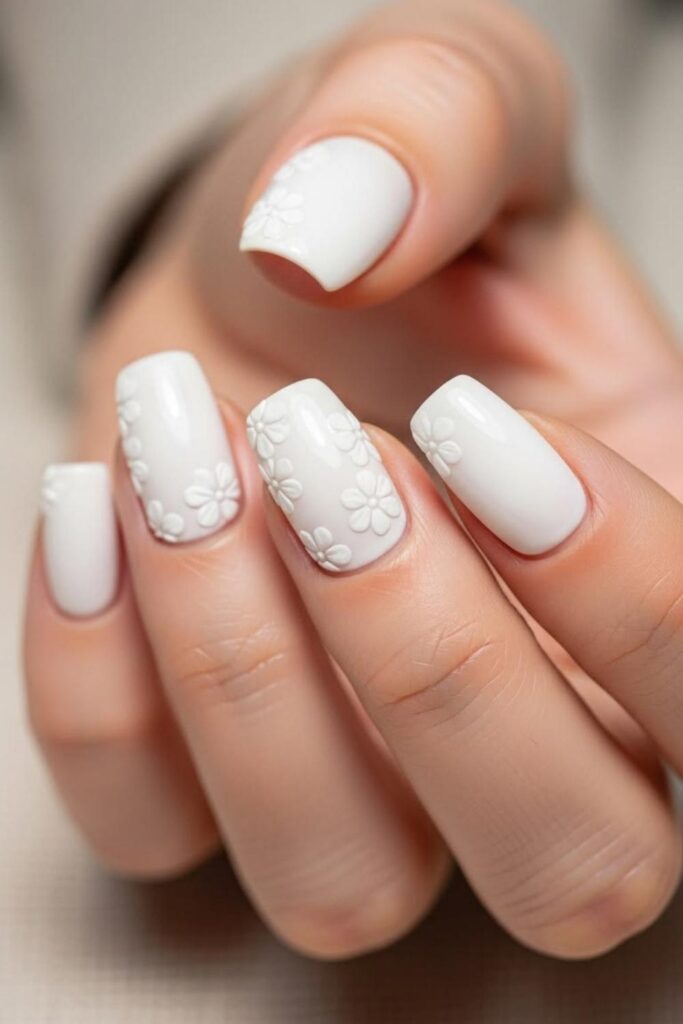
All white, different finishes. A white base in a matte formula, then white flowers painted in a glossy or slightly pearl finish on top. The design is visible only through the contrast in texture rather than color. It’s subtle, elegant, and one of the most underrated nail looks going into 2026. Looks complicated, takes ten minutes and it works with absolutely everything in your wardrobe.
How to Choose the Right Flower Nail Design for You
With so many options, the easiest filter is skill level plus occasion.
If you’re a beginner: start with dotting tool designs (ideas 1, 6, 16, 25). These require zero brush control and still look great.
If you’re comfortable with a thin brush: the rose swirl (idea 2), cherry blossom (idea 9), and fine-line botanical (idea 19) are the next logical steps.
If you want something wearable for work: the minimalist single-stem (idea 12), sage wildflowers (idea 6), and nude daisy (idea 1) all work in professional settings.
If you want something that makes a statement: the neon tropical (idea 10), sunset silhouette (idea 24), or chunky daisy French (idea 20) are your best bets.
And if you’re looking for easy flower nail designs step by step that require minimal tools a dotting tool and a steady hand are genuinely all you need for at least fifteen of the designs on this list.
Style Guide Table
| Design Style | Skill Level | Best Occasion | Tools Needed | Longevity Look |
| Five-Dot Daisy | Beginner | Everyday / Casual | Dotting tool | 5–7 days |
| Rose Swirl | Intermediate | Date night / Brunch | Thin brush | 5–7 days |
| Graphic Black Outline | Beginner | Edgy / Casual | Nail art pen | 7+ days |
| Cherry Blossom Branch | Intermediate | Any occasion | Thin brush + dotting tool | 7+ days |
| Pressed Flower | Beginner | Special events | Tweezers + dried flowers | 5–7 days |
| Watercolor Blush | Beginner | Soft / Romantic | Flat brush | 5–7 days |
| Chrome Petal Tips | Intermediate | Evening / Trendy | Chrome powder + silicone brush | 5–7 days |
| Monochrome White-on-White | Beginner | Work / Minimal | Fine brush | 7+ days |
Common Mistakes to Avoid with Flower Nail Designs
Skipping the base coat. This is where most DIY nail art falls apart not in the design itself but in the prep. A smooth, even base coat gives your design a clean surface and extends wear significantly.
Using polish that’s too thick. Older, thickened polish drags instead of gliding, which makes fine details nearly impossible. Thin your polish slightly with a drop of nail polish thinner (not remover) if it’s gotten goopy.
Rushing between coats. The number one reason flower designs smear is painting the next layer before the previous one is fully dry. A cool air setting on a hairdryer speeds this up without bubbling the polish.
Making petals too symmetrical. Ironically, trying too hard to make petals perfectly even often makes them look worse. A slightly organic, imperfect petal edge reads as handmade and intentional. Let go of the grid.
Sealing too soon. Top coat applied before your design is fully dry can drag the art. Wait at least two full minutes after your last design layer before sealing three if the design has thick layers.
Key Takeaways
- A dotting tool is genuinely all you need for at least half of these designs no brush skills required.
- The rose swirl technique (three curved C-strokes) is the single most reusable skill in flower nail art once you learn it.
- Muted, tonal palettes make beginner designs look more expensive don’t reach for bright colors first.
- Prep matters more than skill: a smooth base coat and fully dry layers make every design land better.
- Easy flower nail designs step by step don’t require expensive tools a toothpick works in place of a dotting tool for small details.
- When in doubt, one accent nail with a floral design is more impactful than ten nails done inconsistently.
FAQ’s
What are the easiest flower nail designs step by step for complete beginners?
The five-dot daisy is the most beginner-friendly of all easy flower nail designs step by step it requires only a dotting tool (or a toothpick) and two polish colors. Place five white dots in a circle on any base color and add one yellow dot in the center. You can complete an entire set in under twenty minutes once you’ve practiced on one nail.
Do I need special brushes for flower nail art at home?
Not necessarily. Many easy flower nail designs step by step can be done with basic tools: a dotting tool for dot-based flowers, a thin eyeliner brush for line work, or even a toothpick for detail. Specialty nail art brushes help with rose swirls and fine-line botanicals, but they’re not required for beginner designs.
How do I make flower nail designs last longer without chipping?
Start with a base coat, apply thin layers of color rather than thick ones, and always finish with a quality top coat applied along the tips of your nails to seal the edges. Reapplying top coat every two days adds significant wear time to any nail art.
Can I do flower nail designs on short nails?
Absolutely. Many easy flower nail designs step by step actually look better on shorter nails the five-dot daisy, minimalist single-stem, and scattered wildflower designs all suit shorter lengths well. For short nails, scale the flowers down and use negative space to keep the design from feeling crowded.
What’s the difference between a nail art pen and a thin brush for flower designs?
A nail art pen is easier to control for beginners since it works like a regular pen no loading or brush angle to manage. A thin brush offers more flexibility in stroke width and pressure, which makes it better for designs like rose swirls and petals. For easy flower nail designs step by step, a nail art pen is the better starting point.
How long does it take to learn basic flower nail art?
Most people can produce a clean five-dot daisy or simple petal design within one or two practice sessions. More detailed designs like rose swirls or cherry blossoms typically take three to five attempts before they look consistently clean. The learning curve is shorter than most people expect.
Are flower nail designs still trendy in 2026?
Yes botanical and floral nail art is one of the strongest continuing trends heading through 2026. Soft daisies, graphic wildflowers, and minimalist single-stem designs are particularly prominent right now, moving away from the overly ornate floral sets of previous years toward cleaner, more wearable interpretations.
Conclusion
Flower nail art doesn’t belong only in salons or on the feeds of professional nail artists. Most of the looks that get saved tens of thousands of times on Pinterest are built on the same basic strokes, the same beginner-friendly tools, and the same logic: keep it simple, let the palette do the work, and don’t overthink the petals.
These easy flower nail designs step by step are a starting point, not a ceiling. Pick one that matches your current skill level and your style then try the next one when you’re ready. The best nail art is the kind you can actually recreate at home on a regular Tuesday, not just the kind that looks impressive in a photo. Go find your version of that, and save this list for when you need it.